Learn how to display product attributes in the front end of Magento. Its pretty simple when compared to other Magento modifications.
Step 1 - Create the Attribute
The first thing you need to do, is create your attribute in Magento. If your attribute is already made, you'll still want to make sure the attribute is properly configured to display on the front end.
If your not sure about making an attribute see this: Creating Attributes
Under the settings for the attribute, found in Catalog > Attributes > Manage Attributes, set both of these options to yes: (Allow HTML Tags on Frontend) and (Visible on Product View Page on Front-end). Make sure your attribute has at least one option value added under the attribute's Manage Label/Options tab.
After that configure your Attribute Sets. They will be found in Catalog > Attributes > Manage Attribute Sets. Make sure each set that you wish to use the new attribute contains the attribute you are working with.
Lastly, you will want to associate your actual product listings with the newly created attribute by either individually editing your products or importing a product update file to magento in a .csv file fomrat. Go to manage your products in Catalog > Manage Products and set them up one by one. If you have a lot of products an import may be faster.
Step 2 - Write the Code
For the second step, this depends on what you selected when making the attribute. Under the following attribute setting field: (Catalog Input Type for Store Owner). Options for that setting could be: Multiple Select, Text Field, Drop Down, and a handful more of very useful options. You may need to use different php calls to get the attribute to display based on what is selected in this setting. In this tutorial, We will be using the option for Multiple Select. I will add ways to work with other attribute input types to this post as I learn them.
Working with Multiple Select Attributes
The Product View Page
With multiple select attributes, you will need to use this call to define your variable:
<?php $multiSelectArray = $this->getProduct()->getAttributeText('your_attribute_code'); ?>Now you are ready to write some php that will display the attributes on product pages. The code below will show any of the attribute's multiple select values that have been selected for a particular product on the view page. It first checks if any of the attribute values are selected, if none are selected, then it will do nothing. If the count is equal to one it will then show the one (You will want this). The last part of the code checks if an array exists (more than one) and it displays them in a list format.
You can copy the below code and paste it where you want the attribute to show on your product view template page located at: app/design/frontend/packageName/themeName/template/catalog/product/view.phtml. Feel free to modify the html parts of the code to your liking.
<?php $multiSelectArray = $this->getProduct()->getAttributeText('diet_type'); ?>
<?php if ($multiSelectArray): ?>
<?php if (count($multiSelectArray)==1): ?>
<div class="product-badges top-border">
<h4>This item is:</h4>
<div class="product-badge <?php echo $multiSelectArray; ?>"><p><?php echo $multiSelectArray; ?></p>
</div>
</div>
<?php else: ?>
<div class="product-badges top-border">
<h4>This item is:</h4>
<ul class="unstyled clearfix">
<?php foreach($multiSelectArray as $multiSelectItem){ ?>
<li class="product-badge <?php echo $multiSelectItem; ?>"><p><?php echo $multiSelectItem; ?></p>
</li>
<?php } ?>
</ul>
</div>
<?php endif ?>
<?php endif ?>
See the Pen <a href="http://codepen.io/legendary_fish/pen/aurKC/">aurKC</a> by James Phillips (<a href="http://codepen.io/legendary_fish">@legendary_fish</a>) on <a href="http://codepen.io">CodePen</a>.
Step 3 - Design Badges and Write CSS
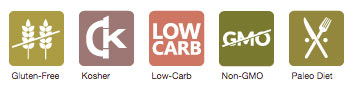
The last part is up to you. Simply create or have a designer make you some awesome badges for your project. My badges were made by a great designer Kerwin Simeus.
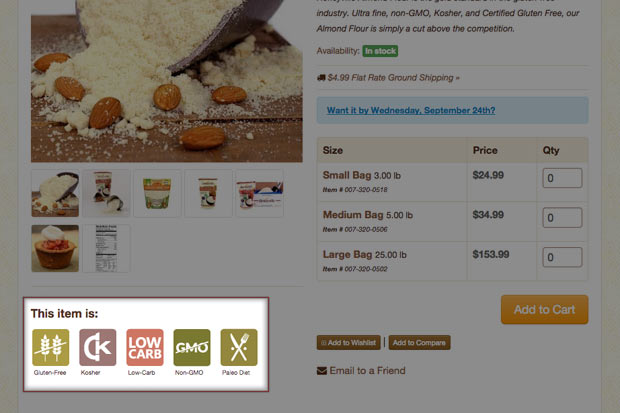
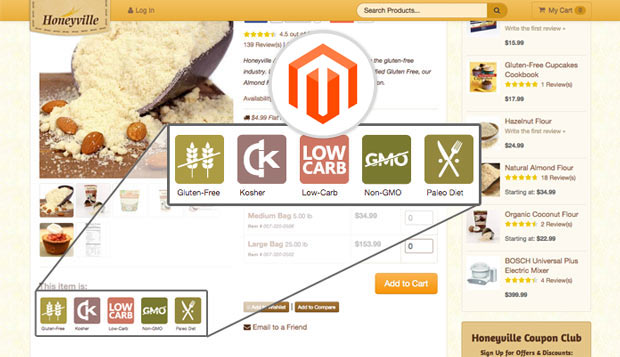
You obviously have the freedom to make your badges how ever you want and with CSS you can even overlay them on the main product photo. I opted to place mine just below the product photo since the attribute values would most likely be lists for most of my products and I didn't want the badges covering the image. In the above code I used the CSS selector "product-badge" and styled away using an image sprite as a background image. To see my code in action view this page: Blanched Almond Flour
Now, go be creative and make some awesome product badges!
Have questions or want to share what you've built by learning from this tutorial? Share in the comments section below.
5 Comments
Nikita
DUDE! These look amazing! Love the direction you took with these, it's very clean and creative! GOOD JOB MAN
Gman
This is awesome. I have it working perfectly on my site's product page. I tried implementing the same code on my category listing page catalog/product/list.phtml but it's breaking my page. Would you be able to advise how to do this? I tried searching but apparently it is not so easy!
James B. Phillips
Hey Gman:
I have yet to try this on a category list page, but I know you will have to go about it a little differently because of the resources that page has for the products. When I do attempt this, I will post how to do it here.
Xander
I can't wait to see how to do this on category pages. Can't seem to get it working there.
Sean
Hi! Thanks for the great work in putting together the code to display attribute badges on product detail pages. Did you ever develop a method for showing these on the category/search page views as well?